

The perfect stain sample can still be the wrong choice for your trim. A successful result starts with the wood itself: its species, condition, and ability to absorb stain. If you’re researching wood staining for interior trim and molding Phoenix homeowners can use to refresh their homes, begin by looking beyond colour.
It’s natural to want trim to complement nearby floors, doors, or cabinetry, while wondering whether existing wood can be stained at all. Grain, old coatings, repairs, and the fine contours of detailed molding all influence the finished appearance. In some rooms, a clear finish or carefully chosen paint may create a more cohesive result than stain.
This guide explains how to assess your trim, compare stain, clear finishes, and paint, and set realistic expectations for colour and consistency. You’ll also learn how surrounding materials and architectural details inform the finish choice, and why careful preparation matters. With a considered plan and skilled workmanship, staining can renew interior woodwork while preserving the character of your Phoenix home.
Key Takeaways
- Learn how wood species, material, condition, and existing coatings can shape the final stain result.
- Compare stain, clear finishes, and paint to identify an approach that suits your trim and surrounding materials.
- Use a deliberate project sequence, from finish selection and surface preparation to protection and final review.
- Discover how wood staining for interior trim and molding Phoenix projects can be tailored to architectural details and the home’s existing finishes.
- See how Crandall Painting & Stucco’s staining and refinishing services can help create a considered, cohesive look.
Wood Staining for Interior Trim and Molding in Phoenix: What the Finish Can Change
Well-finished trim gives a room definition. A considered stain can bring warmth to door casings, frame a window, draw the eye along baseboards, and make the transition between rooms feel intentional. Unlike opaque paint, stain changes or enriches the wood’s colour while allowing some grain to remain visible. The result depends on the material, its condition, preparation, and finish, so a colour chip alone can’t predict the final appearance.
This guide focuses on staining existing interior trim and molding, rather than supplying or installing new molding. For an overview of how stains differ from other wood coatings, see wood stain characteristics and types. The aim is to help you judge what your current woodwork can support and how a renewed finish might relate to the rest of your home.
Which interior details can benefit from a stained finish?
Door casings, baseboards, window trim, and crown molding are all places where stain can highlight natural grain. When repeated elements share a compatible finish, they can create continuity from one room to the next without making every space feel identical. Stained trim may also connect with wood flooring, cabinetry, doors, or other architectural details. The goal isn’t necessarily to match every surface exactly, but to create a deliberate relationship among their tones and textures.
Why Phoenix homes need a finish decision tailored to the room
Consider the room as a whole before settling on a colour. Existing wood tones, natural light, wall colours, and nearby stone or tile all affect how trim reads. A tone that looks balanced beside cabinetry may feel too dark against a pale floor, while a light stain may not provide enough definition in a bright space. There’s no single stain colour suited to every Phoenix home or architectural style. The right choice responds to the actual woodwork and interior palette.
Wood species and prior coatings matter, too. Different surfaces may absorb stain differently, and worn areas, repairs, or an old clear finish can affect consistency. A careful assessment helps set expectations before work begins, particularly on profiled molding, where edges, grooves, and corners make the finish more noticeable. Preparation should suit the trim’s material and condition rather than follow a one-size-fits-all approach.
For broader guidance on caring for wood features, explore wood staining and refinishing services and the principles of wood restoration. Crandall Painting & Stucco provides wood staining, refinishing, and restoration, with attention to the wood, its architectural details, and surrounding surfaces. That planning helps homeowners make a considered choice before moving into assessment and finish selection.
How to Assess Interior Trim Before Choosing a Wood Stain
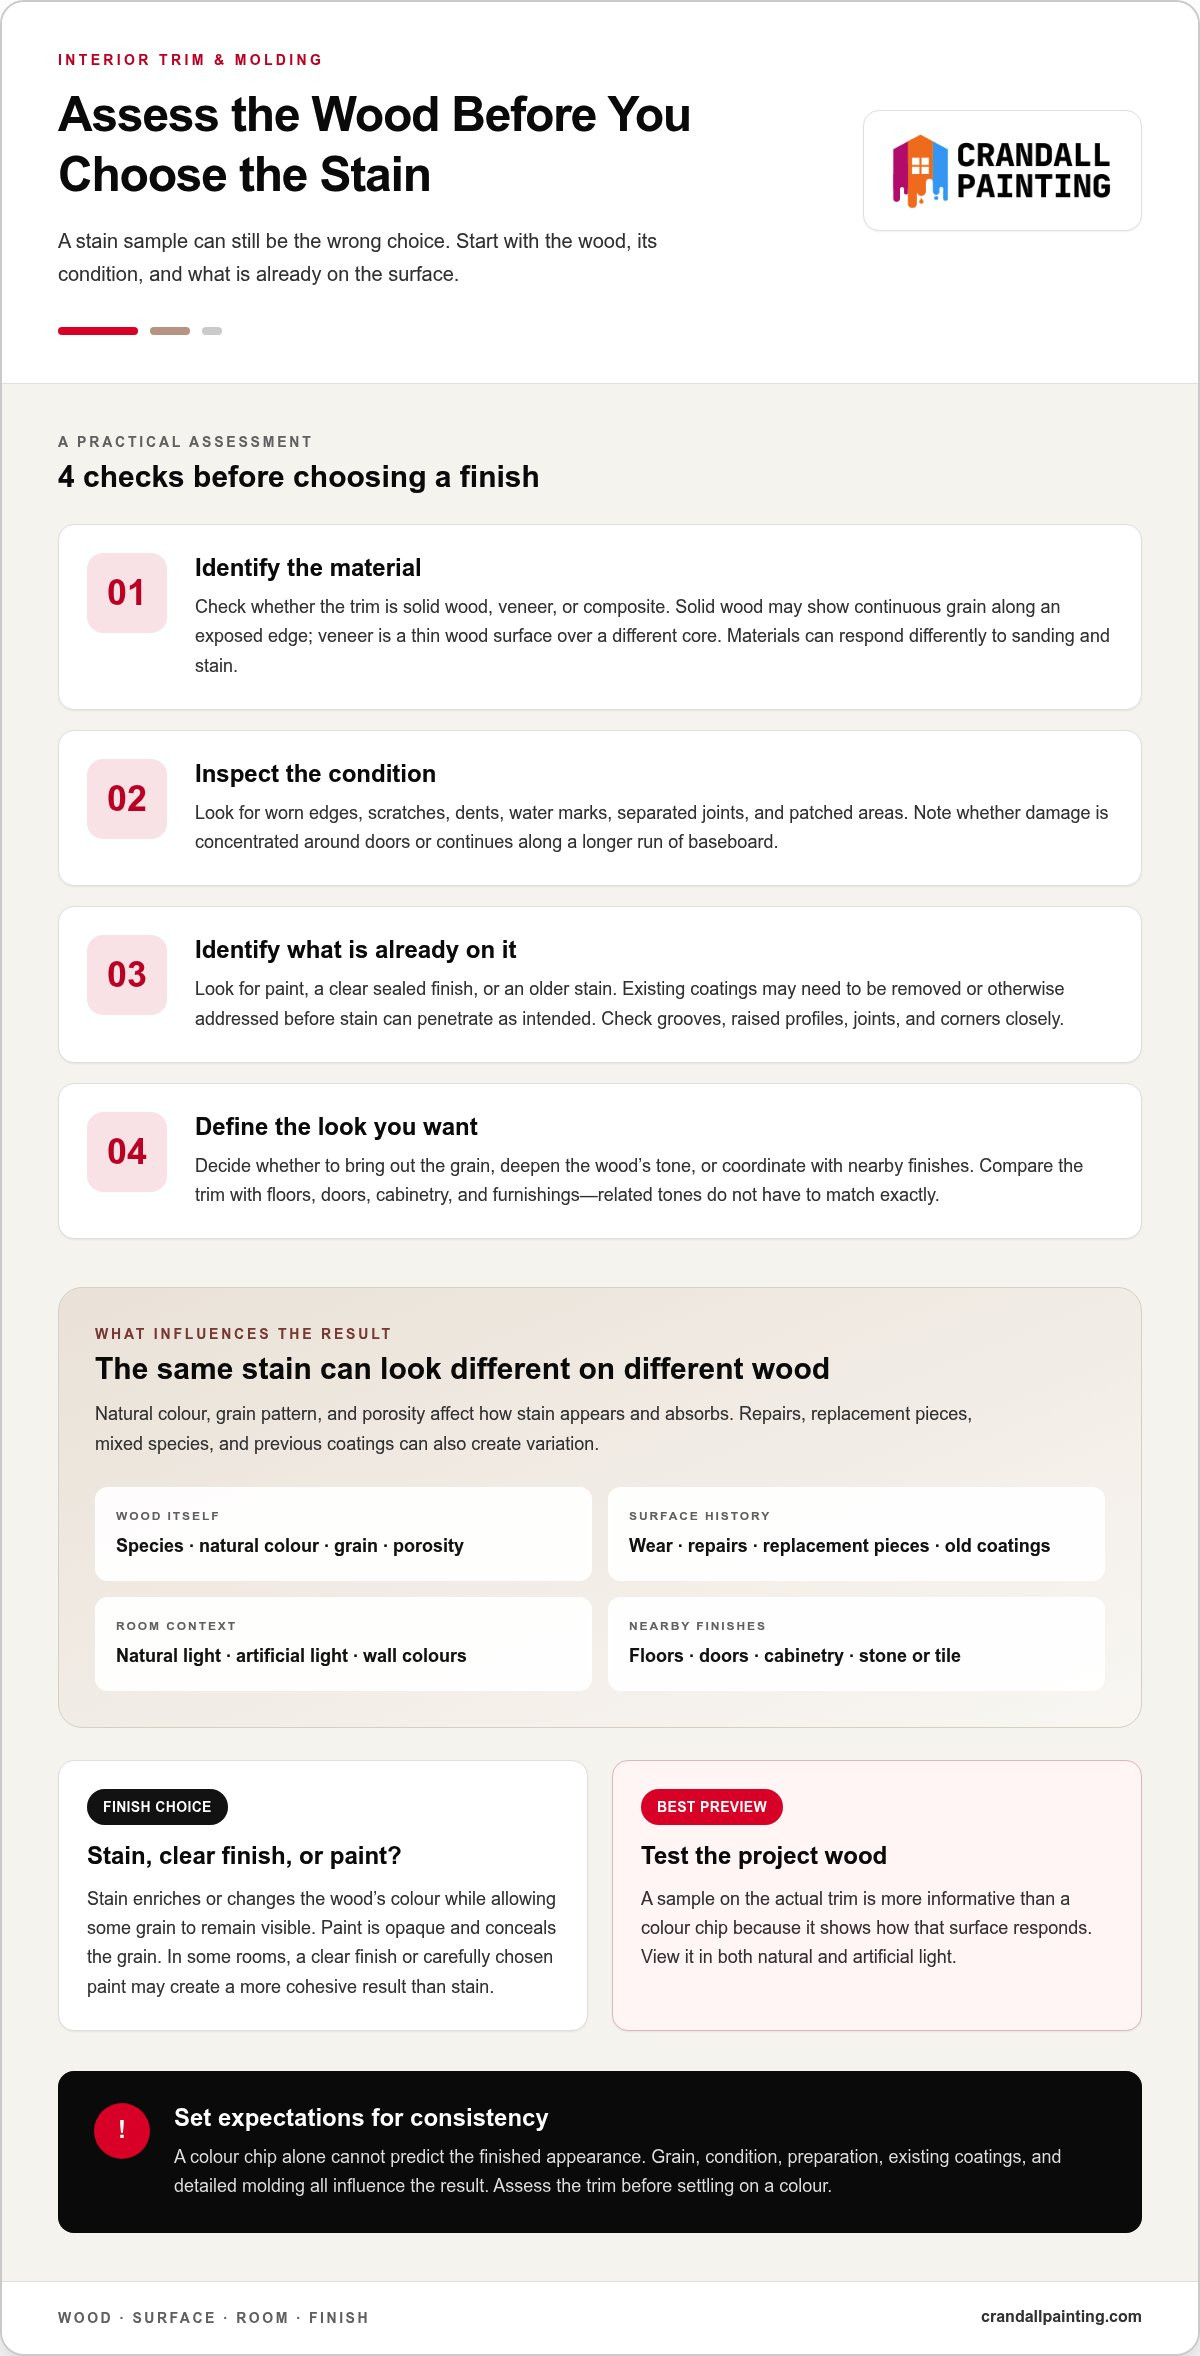
Before settling on a colour, determine what the trim is made of and what is already on its surface. This assessment helps set expectations for how stain may look, what preparation is needed, and whether the material suits the intended finish. For homeowners planning wood staining for interior trim and molding Phoenix homes, these checks provide a practical starting point.
- Identify the material. Look for signs of solid wood, veneer, or composite material. Solid wood may show continuous grain along an exposed edge, while veneer has a thin wood surface over a different core. These materials can respond differently to sanding and staining, so don’t assume every trim piece will take colour in the same way.
- Inspect the condition. Check for worn edges, scratches, dents, water marks, separated joints, and patched areas. Note whether damage is concentrated in high-contact spots, such as around doors, or appears along a longer run of baseboard.
- Identify existing coatings. Look for paint, a clear sealed finish, or an older stain. A coating may need to be removed or otherwise addressed before stain can penetrate as intended. The right preparation depends on what’s present and the trim’s condition.
- Define the target look. Decide whether you want to bring out the grain, deepen the wood’s tone, or coordinate with nearby finishes. Identify which surfaces should relate, such as door trim and flooring, without assuming they need to match exactly.
How wood species and surface condition affect stain results
Natural colour, grain pattern, and porosity influence how stain appears and absorbs. Even pieces that look similar before finishing can take on different tones. Repairs and replacement pieces may also have different grain or absorbency, so the result can vary across mixed species or previously coated trim. A sample applied to the project wood is more informative than a colour chip because it shows how that surface responds.
What to examine on painted, sealed, or previously stained molding
Bare wood and previously stained wood offer a different starting point from painted or sealed trim. Paint conceals the grain, while a clear coating can limit stain penetration. Applying stain over either may not create the expected appearance. Examine grooves, raised profiles, joints, and corners closely, where coating can remain or damage can be easy to miss. These details help determine the preparation needed for a carefully finished result.
How to define the intended colour before work begins
Compare the proposed tone with nearby floors, doors, cabinetry, and furnishings. View a sample in the room’s natural and artificial light, since the same wood can read differently as the lighting changes. A sample clarifies the likely direction, but natural variation between boards or repair areas may remain. Crandall Painting & Stucco tailors its wood staining and refinishing to the material and surrounding finishes, helping homeowners plan with their existing trim in mind.
Stain, Clear Finish, or Paint: Which Trim Look Fits Your Phoenix Home?
The right finish depends on the appearance you want and the condition and material of the trim, not on a universal ranking of stain, clear finish, and paint. Stain changes the wood’s colour while leaving grain visible. A clear finish maintains a natural-looking presentation and can help protect the surface. Paint creates an opaque colour that can coordinate with the room, but conceals the grain.
Use this comparison as a starting point. The surface and any existing coating determine the preparation needed and how each option will look.
| Finish | Visible grain | Colour change | Preparation and material fit |
|---|---|---|---|
| Stained wood | Usually remains visible, with appearance shaped by the wood and stain. | Adds or deepens colour while allowing the grain to show. | Best considered for wood surfaces that can accept stain. Existing coatings may need to be addressed; solid wood and veneer can respond differently. |
| Clear finish | Remains visible and may appear more pronounced under the finish. | Usually preserves the wood’s natural colour, though the finish itself can affect its appearance. | Suited to wood whose existing tone and condition are part of the intended look. Preparation depends on the current surface and coating. |
| Painted trim | Concealed by the opaque finish. | Provides a coordinated colour rather than a transparent wood tone. | Can suit various trim materials when prepared appropriately. Surface condition and existing paint or coating still matter. |
When a stain supports the look of natural wood
Choose stain when you want the wood’s grain to remain part of the room’s character while shifting its tone. Compare possible colours with nearby flooring, doors, cabinetry, and furnishings. The aim is a considered relationship, not necessarily an exact match. Before committing, test the finish on the project wood. A sample shows how that specific surface responds and helps you assess the colour in the room.
When clear finish or paint may better suit the molding
A clear finish may be the better direction if you like the existing wood colour and want to retain its natural appearance. Paint may suit trim that needs an opaque, coordinated colour or where the underlying material doesn’t offer grain you want to feature. Neither option removes the need to assess wear, damage, and old coatings. Stain won’t conceal those issues or make inconsistent materials uniform.
For wood staining for interior trim and molding Phoenix homes, weigh the visual goal alongside the surface’s readiness. Detailed profiles, joints, and worn areas can affect preparation and the finished effect. Comparing the options helps you choose a finish that complements the room while setting realistic expectations for the trim you have.
Planning Interior Trim Staining: Prep to Final Review
A polished result depends on more than stain application. For wood staining for interior trim and molding Phoenix projects, a deliberate sequence helps protect surrounding finishes, address the existing surface, and make the final appearance easier to assess. Preparation should respond to the trim’s material, condition, and current coating rather than follow a single recipe.
- Define the finish. Agree on the desired colour and overall appearance, including how the trim should relate to nearby woodwork and painted surfaces.
- Assess the surfaces. Review the trim for wear, repairs, old coatings, and detailed areas that may need special attention.
- Prepare the work area and wood. Clean and prepare surfaces according to their condition, while protecting adjacent walls, floors, hardware, and furnishings.
- Apply stain and protect the finish. Work through the molding with care, then use a suitable protective finish as part of the planned system.
- Review the result. Examine the completed work in context and identify any areas that need careful touch-up.
What careful preparation means for detailed molding
Assess the profile and existing finish before deciding how to clean or prepare the wood. Grooves, corners, joints, and raised edges can collect residue or show uneven coverage more readily than broad, flat faces. Give each area consistent attention. Before finish work begins, protect nearby walls, floors, hardware, and furnishings so work on the trim doesn’t leave unwanted marks on surrounding surfaces.
How to review samples and the completed finish
Agree on the intended colour and appearance before treating all the trim. A representative sample can clarify how the selected finish looks on the project wood. View it in the room beside adjacent wood and painted surfaces. Once the work is complete, review both the overall transitions and the fine details. The final review may reveal small areas that need careful touch-up for a consistent appearance.
When an experienced wood-finishing team adds value
Detailed profiles and varied surface conditions call for close judgment. A worn section, repaired area, or change in molding profile can affect how the finish reads across a room. Experience helps coordinate those details and maintain considered visual transitions. Crandall Painting & Stucco provides wood staining and restoration, tailoring the work to the wood and its surroundings. Explore its wood staining and restoration services for a sense of the project scope.
For a carefully planned finish on your home’s trim, connect with Crandall Painting & Stucco about interior wood staining.
Choose Crandall for Carefully Considered Interior Trim Staining in Phoenix
Interior trim connects rooms, frames architectural details, and sits alongside flooring, doors, and cabinetry. A considered stain can help those elements feel cohesive while preserving the character of the wood. Crandall Painting & Stucco provides wood staining, refinishing, and restoration in the Phoenix area, with close attention to the trim, the room, and the finish you want to achieve.
A locally rooted approach to wood staining and restoration
Crandall Painting & Stucco is family-owned and serves the Phoenix metro area, including Scottsdale, cottsdale, Paradise Valley, Carefree, DC Ranch, Desert Mountain, and Scottsdale Mountain. A careful, project-specific approach considers existing wood tones, room lighting, molding profiles, and surrounding finishes. Rather than treating every piece of trim as interchangeable, the work is tailored to the wood and architectural details in your home. For homeowners considering wood staining for interior trim and molding Phoenix projects, thoughtful assessment and meticulous finish work guide decisions from preparation through the final appearance.
What to have ready for a productive project conversation
A few observations can make an initial project discussion more focused. Consider which rooms and trim elements you want to update, such as door casings, baseboards, window trim, or crown molding. Note what you know about the existing surface, including whether it appears painted, sealed, or previously stained. It can also help to identify nearby wood tones and describe the appearance you want, whether that means retaining visible grain or coordinating the trim more closely with surrounding finishes.
If the trim includes worn areas, repairs, or pieces that look different from one another, mention those details. They provide useful context for discussing preparation and setting expectations for the finished look. You don’t need every technical answer; a clear sense of the areas you want to address and the overall feel you prefer is a helpful place to begin.
Crandall’s staining and restoration work is shaped around the project rather than a one-size-fits-all finish. Discussing the material, condition, and room context helps clarify the next steps and supports a considered result. Explore interior painting and restoration services from Crandall Painting & Stucco.
Give Your Interior Woodwork a Thoughtful New Direction
The right finish can help interior trim feel connected to the character of your home. Before beginning, consider how you want a room to feel and which wood details deserve greater presence. A simple starting point is to choose one priority area, then note the atmosphere and visual relationship you want it to create with the surrounding space.
For wood staining for interior trim and molding Phoenix homes, the most satisfying direction respects the character of the wood while serving the room as a whole. A focused conversation can turn your preferences into a clear project plan tailored to the trim and the appearance you have in mind.
Plan your interior trim staining project with Crandall and take the next step toward woodwork that feels considered, cohesive, and at home.
Frequently Asked Questions
Can you stain trim that has already been painted?
Painted trim generally can’t be stained directly to create a natural-wood look. Stain colours exposed wood; it doesn’t cover an opaque coating like another paint layer. The existing paint, trim material, and condition determine whether a different finish plan could reveal a wood appearance. For wood staining for interior trim and molding Phoenix projects, assess what’s beneath the coating rather than assuming stain will work over paint.
Can MDF trim be stained to look like natural wood?
Conventional stain won’t give MDF the natural grain of solid timber. MDF is made from wood fibers and resin, rather than continuous wood grain, so applying stain won’t create the same appearance as staining a grain-bearing surface. If you want a wood-inspired effect, painted or decorative faux-finish treatments may be considered, but an exact imitation shouldn’t be assumed. Choose a finish based on the material and the look you want.
Will wood stain hide scratches or dents in interior molding?
No. Stain changes colour, but it won’t reliably conceal scratches, dents, or worn edges. A shallow dent may cast a visible shadow, while a filled repair can take on a different tone from the surrounding wood. Assess damage before finishing to determine whether surface preparation or restoration is appropriate. Testing the proposed finish on the trim can also show how existing marks and wood respond.
Should interior trim match the floor exactly?
No, trim and flooring can coordinate without sharing identical tones. A close match may create continuity, while deliberate contrast can give the room more definition. Consider how the floor relates to doors, cabinetry, furnishings, wall colour, and natural light before deciding. View a stain sample in the room, since a tone that looks balanced beside flooring in one area may feel different under another room’s lighting.
How do I maintain stained interior trim after the project?
Dust trim gently and use cleaning methods suited to its installed finish. Avoid abrasive pads and harsh cleaners unless the finish manufacturer says they’re appropriate, since these may dull or damage the surface. Care needs can vary with the coating and household use; trim near busy doorways may need more frequent attention than molding in a low-traffic room. Wipe spills promptly and follow the project-specific care instructions.
Can interior trim be stained without removing it from the walls?
Some trim can be finished in place, but removal isn’t ruled out for every project. The decision depends on access, the trim’s condition and profile, existing coatings, and how close it sits to walls or flooring. Keeping it installed calls for careful protection of adjacent surfaces, especially around corners and joints. In Phoenix-area homes, including Scottsdale and Paradise Valley, the project scope helps determine the practical approach.